UTFGrids with OpenLayers and Tilestache
A while back, the Development Seed team developed the UTFGrid spec to provide
a standard, scalable way of encoding data for hundreds or thousands of features alongside your map tiles.
The basics
In more detail, the UTFGrids are invisible “ASCII Art” and attribute data embedded in json. They sit “behind” your map tiles (they are not rendered visually) and allows quick attribute lookups without going back to the server. This allows a high degree of real-time map interactivity in an HTML web map - something that has typically been the strong point of plugin-based maps.
So take this tile image…
and it’s corresponding “utfgrid” …
          !######$$$$%%% %%%% %
          !#######$$$$%%%    %%%
         !!#####   $$$%%%    %%%
         !######  $$$$%%% %% %%%
        !!!####  $$$$$%%%%  %%%%
      ! !###### $$$$$$%%%%%%%%%%
     ! !!#####  $$$$$$$%%%%%%%%%
    !!!!!####   $$$$$$%%%%%%%%%%
    !!!!!####   $$$$$$%%%%%%%%%%
    !!!!!####   $$$$$%%%%%%%%%%%
    !!!!!#####% $$   %%%%%%%%%%%
    !!!!!### #      %%%%%%%%%%%%
    !!! #####   ''''%%%%%%%%%%%%
     !   ###      ('%%%%%%%%%%%%
       ) ### #  ( ((%%%%%%%%%%%%
      ))  ##   (((((%%%%%%%%%%%%
      ))  #    ****(+%%%%%%%%%%%
       )        %**++++%%%%%%%%%
       , , ------*+++++%%%%%%%%%
.     ,,,,,------+++++++%%%%%%%%
..  /,,,,,,------++++++%%%%%%%%%
.  //,,,,,,------000++000%%%%%%%
  211,,,,,33------00000000%%%%%%
 2221,,,,33333---00000000000%%%%
222222,,,,3635550000000000000%%%
222222,,,,6665777008900000000%%%
22222::66666777788889900000 %%%%
22222:;;;;%%=7%8888890  0   %%%%
22222;;;; ==??%%888888  00 %%%%%
222222 ;;  =??%%%8888       %%%%
222     ;;   ?A>>@@@          B%
CCC      ;;   DEE@@@          BB
You can see how each character corresponds with a country. The character’s code is used as a lookup key to retrieve the data associated with that feature (which is also included in the json tile).
If you want to dig in, check out the mapbox demo.
The Server side
I’m going to assume you have Tilestache and Mapnik 2+ already installed (if not, you should!). The steps to configuring your server for UTFGrids are fairly simple..
First, set up mapnik xml file pointing to your data source.
<?xml version="1.0"?>

<!-- An ultra simple Mapnik stylesheet -->

<!DOCTYPE Map [
<!ENTITY google_mercator "+proj=merc +a=6378137 +b=6378137 +lat_ts=0.0 +lon_0=0.0 +x_0=0.0 +y_0=0 +k=1.0 +units=m +nadgrids=@null +wktext +no_defs +over">
]>

<Map srs="&google_mercator;">
    <Style name="style">
        <Rule>
            <PolygonSymbolizer>
                <CssParameter name="gamma">.65</CssParameter>
                <CssParameter name="fill">green</CssParameter>
                <CssParameter name="fill-opacity">0.5</CssParameter>
            </PolygonSymbolizer>
            <LineSymbolizer>
                <CssParameter name="stroke">#666</CssParameter>
                <CssParameter name="stroke-width">0.3</CssParameter>
            </LineSymbolizer>
        </Rule>
    </Style>
    <Layer name="layer" srs="&google_mercator;">
        <StyleName>style</StyleName>
        <Datasource>
            <Parameter name="type">shape</Parameter>
            <Parameter name="file">sample_data/world_merc.shp</Parameter>
        </Datasource>
    </Layer>
</Map>
Next, set up tilestache configuration file
{
"cache": {
           "name": "Disk",
           "path": "/tmp/stache"
},
"layers": {
    "world":
    {
        "provider": {"name": "mapnik", "mapfile": "style.xml"}
    },
    "world_utfgrid":
    {
        "provider":
        {
        "class": "TileStache.Goodies.Providers.MapnikGrid:Provider",
        "kwargs":
        {
            "mapfile": "style.xml",
            "fields":["NAME", "POP2005"],
            "layer_index": 0,
            "scale": 4
        }
    }
  }
}
Finally, you’re ready to run the tilestache server…
tilestache-server.py -c your.cfg -i localhost -p 7890
Now you should be serving utfgrids to http://localhost:7890/world_utfgrid/
The Client side
Now we need something to consume the UTFGrid tiles and interact with them in an HTML/JS environment. The original client implementation of UTFGrid support is provided by Wax which sits atop mapping clients like Modest Maps and Leaflet. Wax is very slick and easy to use but doesn’t work so well for more complex arrangements or with OpenLayers-based maps.
Rather than clog up Wax with the complex UTFGrid use cases that we envisioned, we decided to implement a UTFGrid client in native OpenLayers. Hence my project for the OSGEO code sprint was born.
The result was a new OpenLayers Layer which loads up the json “tiles” behind the scenes…
        var grid_layer = new OpenLayers.Layer.UTFGrid(
            'Invisible UTFGrid Layer',
            "./utfgrid/world_utfgrid/${z}/${x}/${y}.json"
        );
        map.addLayer(grid_layer);
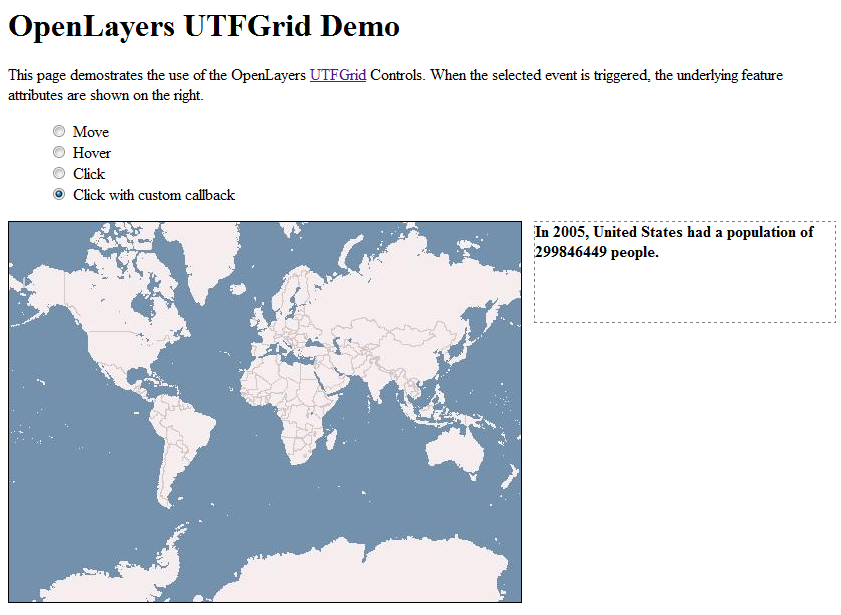
and an OpenLayers Control that handles how the mouse events interact with the grid. In this example, as the mouse moves over the map, a custom callback if fired off which updates a div with some attribute information.
       var callback = function(attributes) {
            if (attributes) {
                var msg  = "<strong>In 2005, " + attributes.NAME
                    msg += " had a population of " + attributes.POP2005 + " people.</strong>";
                var element = OpenLayers.Util.getElement('attrsdiv');
                element.innerHTML = msg;
                return true;
            } else {
                this.element.innerHTML = '';
                return false;
            }
        }

        var control = new OpenLayers.Control.UTFGrid({
            'handlerMode': 'move',
            'callback': callback
        });
        map.addControl(control);
Overall the design goal was to decouple the loading/tiling of the UTFGrids from the interactivity/control. I think this works out nicely and, while a bit more cumbersome than the method used by Wax, it is more flexible and integrates well with existing OpenLayers apps.
You can see them in action on the examples pages:
-
Demonstrating the use of different event handlers (click, hover, move)
-
Demonstrating multiple interactivity layers (the interactivity layer need not visible in the map tiles!)
And feel free to check out the code at my github fork for the code.
What do you think? Let me know…
blog comments powered by Disqus

